TwoFactorAdminLogin/ja: Difference between revisions
From LimeSurvey Manual
Bravehorse (talk | contribs) Created page with "==2FA-Setting==" |
Updating to match new version of source page |
||
| (18 intermediate revisions by 2 users not shown) | |||
| Line 10: | Line 10: | ||
'''2要素認証'''(2FA)は、アカウントのセキュリティを強化する方法です。アカウントへのアクセスに2つの検証方法が使用されるため、"2要素認証"と呼ばれます。第1の"要素"はどのアカウントでも標準となっている通常のパスワードです。第2の"要素"はコンピューターまたはモバイル機器の2FAアプリケーションから取得する検証コードです、2FAとその重要性の詳細については、こちらの[https://en.wikipedia.org/wiki/Multi-factor_authentication 記事]を参照してください。 | '''2要素認証'''(2FA)は、アカウントのセキュリティを強化する方法です。アカウントへのアクセスに2つの検証方法が使用されるため、"2要素認証"と呼ばれます。第1の"要素"はどのアカウントでも標準となっている通常のパスワードです。第2の"要素"はコンピューターまたはモバイル機器の2FAアプリケーションから取得する検証コードです、2FAとその重要性の詳細については、こちらの[https://en.wikipedia.org/wiki/Multi-factor_authentication 記事]を参照してください。 | ||
<div class="mw-translate-fuzzy"> | |||
有効にした場合、LimeSurveyにログインするときに、6桁(既定値)のコードを入力する必要があります。 | 有効にした場合、LimeSurveyにログインするときに、6桁(既定値)のコードを入力する必要があります。 | ||
</div> | |||
<div lang="en" dir="ltr" class="mw-content-ltr"> | |||
When TOTP is enabled, a 6 digits code (default value) has to be introduced when you log in to your LimeSurvey instance. If Yubikey is configured, when logging in, the Yubikey will create the code. | |||
</div> | |||
| Line 17: | Line 23: | ||
この機能の詳細は、以下をお読みください。 | この機能の詳細は、以下をお読みください。 | ||
<span id="How_to_install_the_2FA_plugin"></span> | <span id="How_to_install_the_2FA_plugin"></span> | ||
=2FAプラグインのインストール方法= | =2FAプラグインのインストール方法= | ||
== | <div lang="en" dir="ltr" class="mw-content-ltr"> | ||
Since version 6.x the plugin is a core plugin. So just visit the [[Plugin manager|Plugin Manager]] page and enable it from there (see below for more details). | |||
</div> | |||
<span id="Activate_the_2FA_plugin"></span> | <span id="Activate_the_2FA_plugin"></span> | ||
=2FAプラグインを有効にする= | =2FAプラグインを有効にする= | ||
2FAプラグインを有効にするには、LimeSurveyにアクセスし、[[Plugin manager/ja|プラグインマネージャー]]から設定します。 | 2FAプラグインを有効にするには、LimeSurveyにアクセスし、[[Plugin manager/ja|プラグインマネージャー]]から設定します。 | ||
| Line 62: | Line 49: | ||
設定ページには次の設定があります。 | 設定ページには次の設定があります。 | ||
<div class="mw-translate-fuzzy"> | |||
< | |||
*'''発行者:''' このボックスに入力したテキストがアプリ上で発行者として表示されます。 | *'''発行者:''' このボックスに入力したテキストがアプリ上で発行者として表示されます。 | ||
*'''桁数:''' コードの桁数です。Google Authenticatorの場合は6のままにしてください。 | *'''桁数:''' コードの桁数です。Google Authenticatorの場合は6のままにしてください。 | ||
*'''有効期間:''' コードが有効な秒数です。Google Authenticatorの場合は30のままにしてください。 | *'''有効期間:''' コードが有効な秒数です。Google Authenticatorの場合は30のままにしてください。 | ||
*'''不一致:''' 有効期間が切れた後にクライアントに許可される不一致の秒数です。 | *'''不一致:''' 有効期間が切れた後にクライアントに許可される不一致の秒数です。 | ||
</div> | |||
<div lang="en" dir="ltr" class="mw-content-ltr"> | |||
*''Issuer:'' The text typed in this box will be displayed in the app as issuer name. | |||
*''Digits:'' The number of digits the resulting codes will be. Please leave it at 6 for Google Authenticator. | |||
*''TimePeriod:'' The number of seconds a code will be valid. If you use Google Authenticator, please leave it to 30. | |||
*''Discrepancy:'' The amount of discrepancy is allowed for the client after the TimePeriod expires (seconds) | |||
</div> | |||
<div class="mw-translate-fuzzy"> | |||
*'''アルゴリズム:''' ハッシュ生成に使用されるアルゴリズムです。 | *'''アルゴリズム:''' ハッシュ生成に使用されるアルゴリズムです。 | ||
**''SHA1(既定)'' | **''SHA1(既定)'' | ||
**''SHA256'' | **''SHA256'' | ||
**''MD5'' | **''MD5'' | ||
</div> | |||
<div lang="en" dir="ltr" class="mw-content-ltr"> | |||
'''Yubikey Settings:''' | |||
</div> | |||
<div lang="en" dir="ltr" class="mw-content-ltr"> | |||
*''YubiCloud Client ID'': Your YubiCloud Client ID for validating Yubikey authentication attempts. This is required to use Yubikey as an authentication method. | |||
*''YubiCloud Secret Key'': Optional but recommended. When set, the YubiCloud responses' authenticity will be verified, providing an additional layer of security. | |||
</div> | |||
<div lang="en" dir="ltr" class="mw-content-ltr"> | |||
To obtain these credentials, you can sign up for a Yubico API key at the [https://upgrade.yubico.com/getapikey/ Yubico API key signup page]. | |||
</div> | |||
<div class="mw-translate-fuzzy"> | |||
*'''2FAを強制:''' 有効にすると、すべてのユーザーは、LimeSurveyに再度ログインした後に2FAトークンを作成する必要があります。 | *'''2FAを強制:''' 有効にすると、すべてのユーザーは、LimeSurveyに再度ログインした後に2FAトークンを作成する必要があります。 | ||
</div> | |||
<div lang="en" dir="ltr" class="mw-content-ltr"> | |||
*''Force 2FA:'' | |||
** Only prompt, no enforcement Users without 2FA token are redirected to 2FA creation after login | |||
** Always enforce 2FA activation Users without 2FA token are redirected to 2FA creation after login, and no other action are available, except remote control. | |||
</div> | |||
<div class="mw-translate-fuzzy"> | |||
2FA設定を更新したら忘れずに"保存"をクリックしてください。 | 2FA設定を更新したら忘れずに"保存"をクリックしてください。 | ||
</div> | |||
<span id="2-Factor-Settings"></span> | <span id="2-Factor-Settings"></span> | ||
| Line 99: | Line 116: | ||
2FAトークンが未作成の場合、次のページが表示されます。 | |||
| Line 105: | Line 122: | ||
<div class="mw-translate-fuzzy"> | |||
2FAトークンを作成する場合、"今すぐ2FAを登録する"をクリックします。次のメッセージボックスが表示されます。 | |||
</div> | |||
<div class="mw-translate-fuzzy"> | |||
2FAを有効にするには、 | |||
#2FA認証方法を選択します。既定では、Google Authenticator(既定)、Authy、YubiKey、Authenticator Plus、Duo、HDE OTPの5種類の2FAが提供されています。 | |||
#携帯電話でQRコードをスキャンします。推奨アプリケーションのリストは、こちらの[https://en.wikipedia.org/wiki/Help:Two-factor_authentication#Enabling_2FA_on_smartphones_and_tablet_computers 記事]を参照してください。 | |||
#2FAアプリケーションに表示されている確認キーを入力します。 | |||
</div> | |||
< | <div lang="en" dir="ltr" class="mw-content-ltr"> | ||
When selecting a TOTP 2FA method: | |||
* Scan the QR-code with your mobile phone. For a list of application recommendations, check this [https://en.wikipedia.org/wiki/Help:Two-factor_authentication#Enabling_2FA_on_smartphones_and_tablet_computers article]. | |||
* Enter the confirmation key displayed in your 2FA application. | |||
</div> | |||
<div lang="en" dir="ltr" class="mw-content-ltr"> | |||
When selecting Yubikey: | |||
* Generate a code with your Yubikey in the confirmation key. | |||
</div> | |||
{{Note| | {{Note|技術的な観点では、TOTP(Time-based One-Time Password algorithm)をサポートする任意の2FAアプリケーションを使用できます。TOTPの詳細については、こちらの[https://en.wikipedia.org/wiki/Time-based_One-time_Password_algorithm 記事]を参照してください。}} | ||
<div class="mw-translate-fuzzy"> | |||
2FAトークンの作成を確認するには、"2FAバインディングの作成"をクリックします。 | |||
</div> | |||
<hr width="50%" style="margin:auto"> | <hr width="50%" style="margin:auto"> | ||
<div lang="en" dir="ltr" class="mw-content-ltr"> | |||
== Personal 2FA Settings == | |||
</div> | |||
<div lang="en" dir="ltr" class="mw-content-ltr"> | |||
Once done, the following two options will be displayed in your personal 2FA settings: | Once done, the following two options will be displayed in your personal 2FA settings: | ||
</div> | |||
| Line 130: | Line 166: | ||
* ''' | <div class="mw-translate-fuzzy"> | ||
* '''2FAを削除:''' アカウントに関連付けられた2FAトークンを削除します。 | |||
</div> | |||
{{Note|注意:プラグイン設定で"2FAを強制"が有効になっている場合は、再度認証する必要があります。}} | |||
<div class="mw-translate-fuzzy"> | |||
* '''2FAをリセット:''' このオプションを選択すると、新しいQRコードをスキャンして新しい確認キーを入力するよう求められます。 | |||
</div> | |||
* ''' | |||
==2FA-Administration== | ==2FA-Administration== | ||
必要な権限があれば、2FAユーザー管理パネルにアクセスし、2FAを有効にしたユーザーの数を確認することができます。 | |||
| Line 148: | Line 185: | ||
*''' | *'''操作:''' 2FAを有効にしているユーザーの横にある本欄に赤いゴミ箱ボタンが表示されます。LimeSurveyにログインできなくなったため2FAトークンのリセットしてほしいとリクエストされた場合、ここから当該ユーザーのアカウントに関連付けられている2FAトークンを削除できます。 | ||
*''' | *'''ユーザー名:''' すべてのユーザーが一覧表示されます。 | ||
*''' | *'''フルネーム:''' ユーザーが入力したフルネームが表示されます。 | ||
*''' | *'''メール:''' ユーザーのメールアドレス。 | ||
*''' | *'''2FAメソッド:''' ユーザーが選択した2FAメソッド。 | ||
*''' | *'''2FAが有効:''' "1"の場合、このユーザーが2FAを有効にしていることを意味します。 | ||
<span id="FAQs"></span> | |||
=FAQ= | |||
== | <span id="I_am_a_super_administrator_and_locked_myself_out._How_can_I_delete_my_2FA-token?"></span> | ||
==私はスーパー管理者ですが、ロックアウトされました。2FAトークンを削除するにはどうすればよいですか?== | |||
データベースにアクセスし、2FA関連の列を削除する必要があります。 | |||
== | <span id="How_can_I_enforce_2FA_to_all_my_users?"></span> | ||
==全ユーザーに2FAを強制するにはどうしたらいいですか?== | |||
プラグインの設定メニューから"2FAを強制"を有効にします。 | |||
== | <span id="I_use_LimeSurvey_Cloud._Do_I_have_to_purchase_the_plugin?"></span> | ||
==LimeSurvey Cloudを使用しています。プラグインを購入する必要がありますか?== | |||
いいえ。このプラグインはLimeSurveyのコアプラグインの一部です。プラグインメニューにアクセスして有効にすることができます。 | |||
Latest revision as of 21:06, 14 April 2025
はじめに
2要素認証(2FA)は、アカウントのセキュリティを強化する方法です。アカウントへのアクセスに2つの検証方法が使用されるため、"2要素認証"と呼ばれます。第1の"要素"はどのアカウントでも標準となっている通常のパスワードです。第2の"要素"はコンピューターまたはモバイル機器の2FAアプリケーションから取得する検証コードです、2FAとその重要性の詳細については、こちらの記事を参照してください。
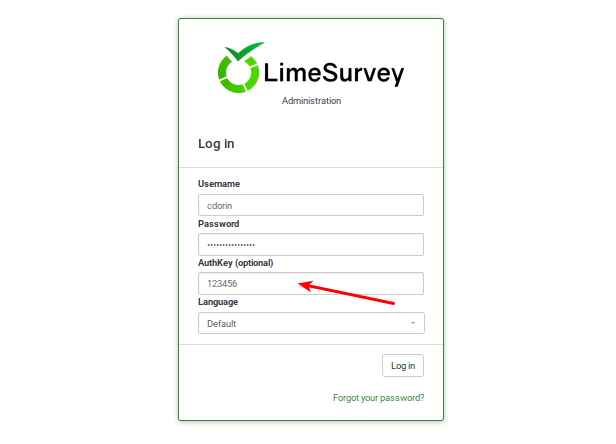
有効にした場合、LimeSurveyにログインするときに、6桁(既定値)のコードを入力する必要があります。
When TOTP is enabled, a 6 digits code (default value) has to be introduced when you log in to your LimeSurvey instance. If Yubikey is configured, when logging in, the Yubikey will create the code.

この機能の詳細は、以下をお読みください。
2FAプラグインのインストール方法
Since version 6.x the plugin is a core plugin. So just visit the Plugin Manager page and enable it from there (see below for more details).
2FAプラグインを有効にする
2FAプラグインを有効にするには、LimeSurveyにアクセスし、プラグインマネージャーから設定します。

既定の設定を確認するには、"設定"をクリックします。
プラグイン設定
設定ページには次の設定があります。
- 発行者: このボックスに入力したテキストがアプリ上で発行者として表示されます。
- 桁数: コードの桁数です。Google Authenticatorの場合は6のままにしてください。
- 有効期間: コードが有効な秒数です。Google Authenticatorの場合は30のままにしてください。
- 不一致: 有効期間が切れた後にクライアントに許可される不一致の秒数です。
- Issuer: The text typed in this box will be displayed in the app as issuer name.
- Digits: The number of digits the resulting codes will be. Please leave it at 6 for Google Authenticator.
- TimePeriod: The number of seconds a code will be valid. If you use Google Authenticator, please leave it to 30.
- Discrepancy: The amount of discrepancy is allowed for the client after the TimePeriod expires (seconds)
- アルゴリズム: ハッシュ生成に使用されるアルゴリズムです。
- SHA1(既定)
- SHA256
- MD5
Yubikey Settings:
- YubiCloud Client ID: Your YubiCloud Client ID for validating Yubikey authentication attempts. This is required to use Yubikey as an authentication method.
- YubiCloud Secret Key: Optional but recommended. When set, the YubiCloud responses' authenticity will be verified, providing an additional layer of security.
To obtain these credentials, you can sign up for a Yubico API key at the Yubico API key signup page.
- 2FAを強制: 有効にすると、すべてのユーザーは、LimeSurveyに再度ログインした後に2FAトークンを作成する必要があります。
- Force 2FA:
- Only prompt, no enforcement Users without 2FA token are redirected to 2FA creation after login
- Always enforce 2FA activation Users without 2FA token are redirected to 2FA creation after login, and no other action are available, except remote control.
2FA設定を更新したら忘れずに"保存"をクリックしてください。
2要素設定
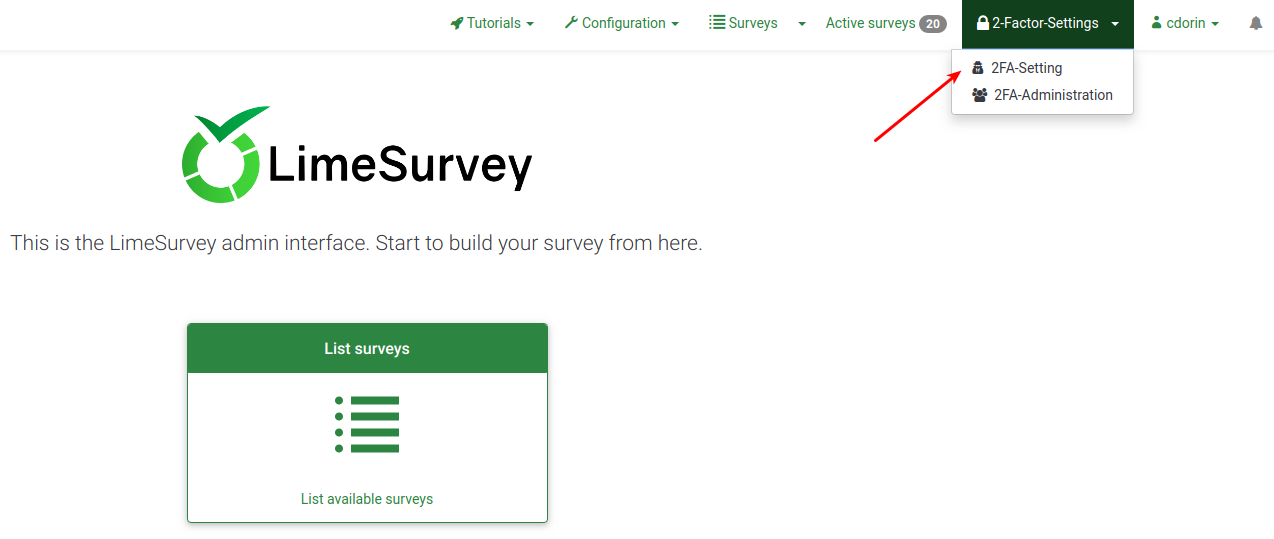
プラグインを有効にすると、新しいメニュー項目がトップバーに表示されます。

ドロップダウンメニューには次の2つのオプションがあります。
- 2FA-Setting: ユーザーは2FA設定を有効にして管理できます。
- 2FA-Administration: 適切な権限がある場合、他のユーザーが2FAを使用しているか確認することができます。
2FA-Setting
2FAトークンが未作成の場合、次のページが表示されます。

2FAトークンを作成する場合、"今すぐ2FAを登録する"をクリックします。次のメッセージボックスが表示されます。
2FAを有効にするには、
- 2FA認証方法を選択します。既定では、Google Authenticator(既定)、Authy、YubiKey、Authenticator Plus、Duo、HDE OTPの5種類の2FAが提供されています。
- 携帯電話でQRコードをスキャンします。推奨アプリケーションのリストは、こちらの記事を参照してください。
- 2FAアプリケーションに表示されている確認キーを入力します。
When selecting a TOTP 2FA method:
- Scan the QR-code with your mobile phone. For a list of application recommendations, check this article.
- Enter the confirmation key displayed in your 2FA application.
When selecting Yubikey:
- Generate a code with your Yubikey in the confirmation key.
2FAトークンの作成を確認するには、"2FAバインディングの作成"をクリックします。
Personal 2FA Settings
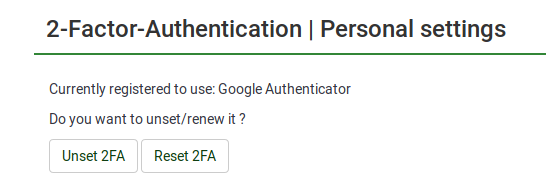
Once done, the following two options will be displayed in your personal 2FA settings:

- 2FAを削除: アカウントに関連付けられた2FAトークンを削除します。
- 2FAをリセット: このオプションを選択すると、新しいQRコードをスキャンして新しい確認キーを入力するよう求められます。
2FA-Administration
必要な権限があれば、2FAユーザー管理パネルにアクセスし、2FAを有効にしたユーザーの数を確認することができます。

- 操作: 2FAを有効にしているユーザーの横にある本欄に赤いゴミ箱ボタンが表示されます。LimeSurveyにログインできなくなったため2FAトークンのリセットしてほしいとリクエストされた場合、ここから当該ユーザーのアカウントに関連付けられている2FAトークンを削除できます。
- ユーザー名: すべてのユーザーが一覧表示されます。
- フルネーム: ユーザーが入力したフルネームが表示されます。
- メール: ユーザーのメールアドレス。
- 2FAメソッド: ユーザーが選択した2FAメソッド。
- 2FAが有効: "1"の場合、このユーザーが2FAを有効にしていることを意味します。
FAQ
私はスーパー管理者ですが、ロックアウトされました。2FAトークンを削除するにはどうすればよいですか?
データベースにアクセスし、2FA関連の列を削除する必要があります。
全ユーザーに2FAを強制するにはどうしたらいいですか?
プラグインの設定メニューから"2FAを強制"を有効にします。
LimeSurvey Cloudを使用しています。プラグインを購入する必要がありますか?
いいえ。このプラグインはLimeSurveyのコアプラグインの一部です。プラグインメニューにアクセスして有効にすることができます。