Grupy pytań – wprowadzenie
From LimeSurvey Manual
Utwórz grupę pytań
Grupy to świetny sposób na uporządkowanie ankiet poprzez umieszczenie ich w kategoriach (grupach). To, jak kategoryzujesz swoje ankiety/grupy, zależy wyłącznie od Ciebie.
Aby dodać grupy pytań do ankiety:
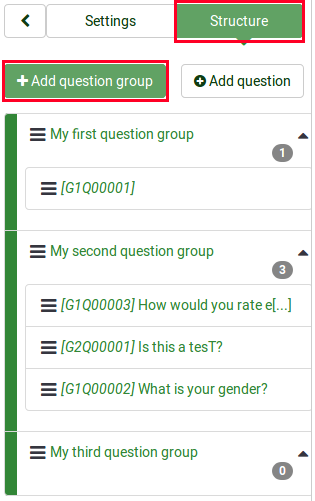
(1) W zakładce ankieta struktura swojej ankiety kliknij '+Dodaj grupę pytań.
Po kliknięciu przycisku „Dodaj grupę pytań” wyświetlony zostanie panel dodawania grupy pytań.
(2) Wypełnij wymagane pola.
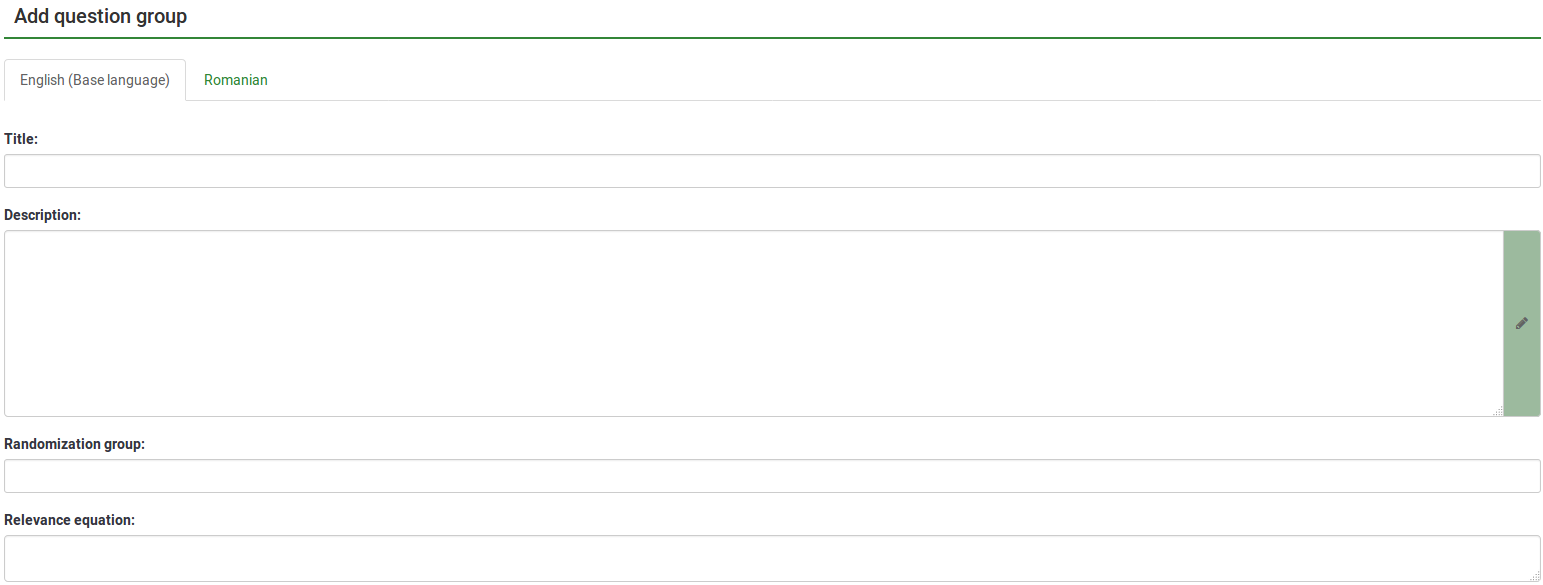
Pola „Dodaj grupę pytań”.
- Tytuł: Wpisz w tym polu nazwę, którą chcesz nadać grupie pytań;
- Opis: To pole umożliwia opublikowanie objaśnień do dowolnego zestawu pytań. Jeśli dodasz opis, będzie on prezentowany wraz z ankietą przed rozpoczęciem któregokolwiek z pytań w tej grupie. Jeśli nie zostanie dodany żaden tekst, uczestnicy publiczni po prostu przejdą od razu do pytań ankiety. Możesz użyć edytora HTML, aby dołączyć obrazy, sformatowany tekst itp. według własnych upodobań;
- Grupa losowa: Aby rozpocząć losowanie grupy pytań, wpisz w polu ciąg znaków, na przykład randgroup1. Będziesz musiał wprowadzić ten sam ciąg znaków we wszystkich grupach pytań, które chcesz losować i które będą następnie wyświetlane w losowej kolejności podczas wypełniania ankiety. Tylko miejsca w tej samej grupie zostaną losowo zamienione!
- Równanie istotności: W tym polu możesz ustawić „równanie istotności” dla grupy za pomocą ExpressionScript. Jest to przydatne w przypadku „zapętlenia” lub w innych przypadkach, gdy wielokrotnie powtarzasz podobną treść. Załóżmy na przykład, że chcesz zadać ten sam zestaw pytań uzupełniających każdemu dziecku w gospodarstwie domowym, a za pomocą pytania o nazwie „numKids” zapytałeś, ile jest dzieci. Następnie dla każdej grupy pytań uzupełniających należałoby zastosować równania istotności (które zbierałyby dane o trzecim dziecku), takie jak: numKids == 3;
You can create as many groups as you like!
Add question group toolbar
You will find the following options on the top toolbar:
- Display/Export: This function is used to export your whole survey in different formats.
- Survey participants: Clicking this button will redirect the survey administrator to his/her survey participants table.
- Responses: If the survey is active, the button becomes visible. It offers you access to the responses table.
- Import a group: Besides the two ways mentioned above, new question groups can also be added via the import group function.
Import a question group
You can also import a question group (.lsg file format) that was previously exported from a LimeSurvey survey.
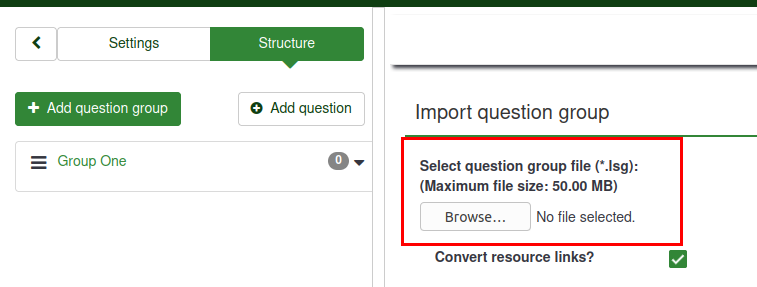
(1) From the survey Structure tab, click +Add question group.
(2) Click Import a group on the top toolbar.
(3) Browse your computer/server and upload the .lsg file that contains the question group you wish to import.
Question group actions
After the creation of a survey, you can access the newly created group from the survey structure menu. The following page will be displayed:

The page is divided into three sections:
- Question group toolbar: You will find the following options on the toolbar:
- Preview survey/question group: Click one of the two buttons to either preview your whole survey or only the current question group. If additional languages were added to your survey, the survey/question group can be previewed in each language of the survey. Just click one of the two preview buttons and select the desired language.
- Edit current question group: Click this button to edit the title, description, relevance equation, or randomization group of the current question group.
- Check survey logic for current question group: This helps you see the possible errors that might exist within a question group - it is especially useful when the ExpressionScript is used.
- Delete current question group: To delete the current question group, click this button.
- Export this question group: If you wish to export this question group to later import it into another LimeSurvey survey, click this button. The file will be exported in the .lsg format.
- Group summary: The main question group details are displayed;
- Group quick actions: This allows you to quickly perform question-groups-related actions - in our case, the add new question to group option is displayed. To find out more about questions, read our introductory wiki section on question.
Preview question group
Once you have started to add questions into your group, you may want from time to time to preview how the respective question group looks. To do that, look for the question group button that can be accessed from the:
Preview question group - survey structure
Click the survey Structure tab, select the desired Question group, and click preview question group:

Preview question group - question group panel
You can preview the question group once you have finished editing it.
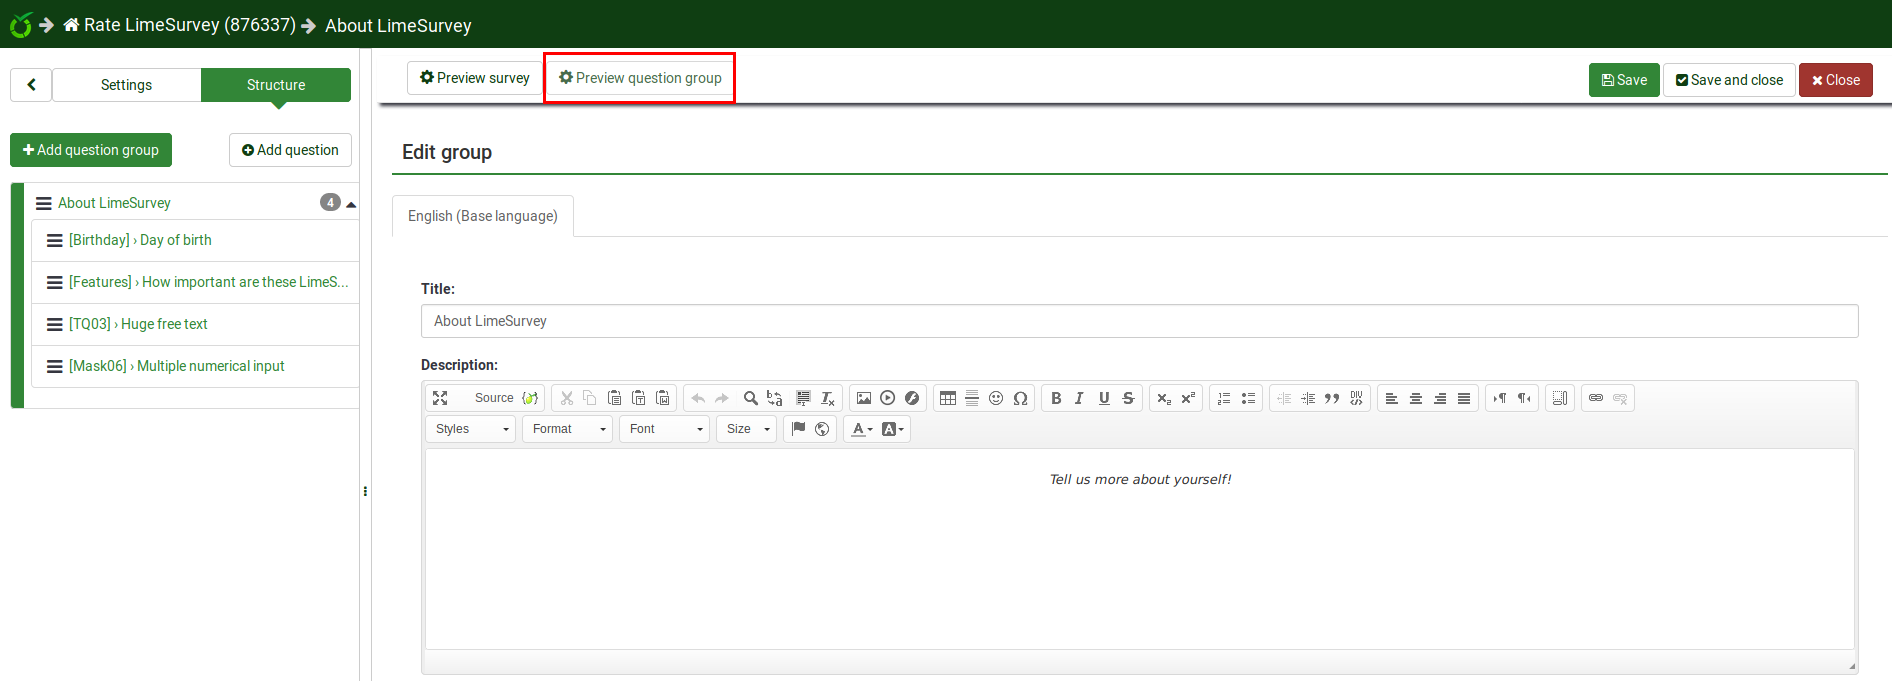
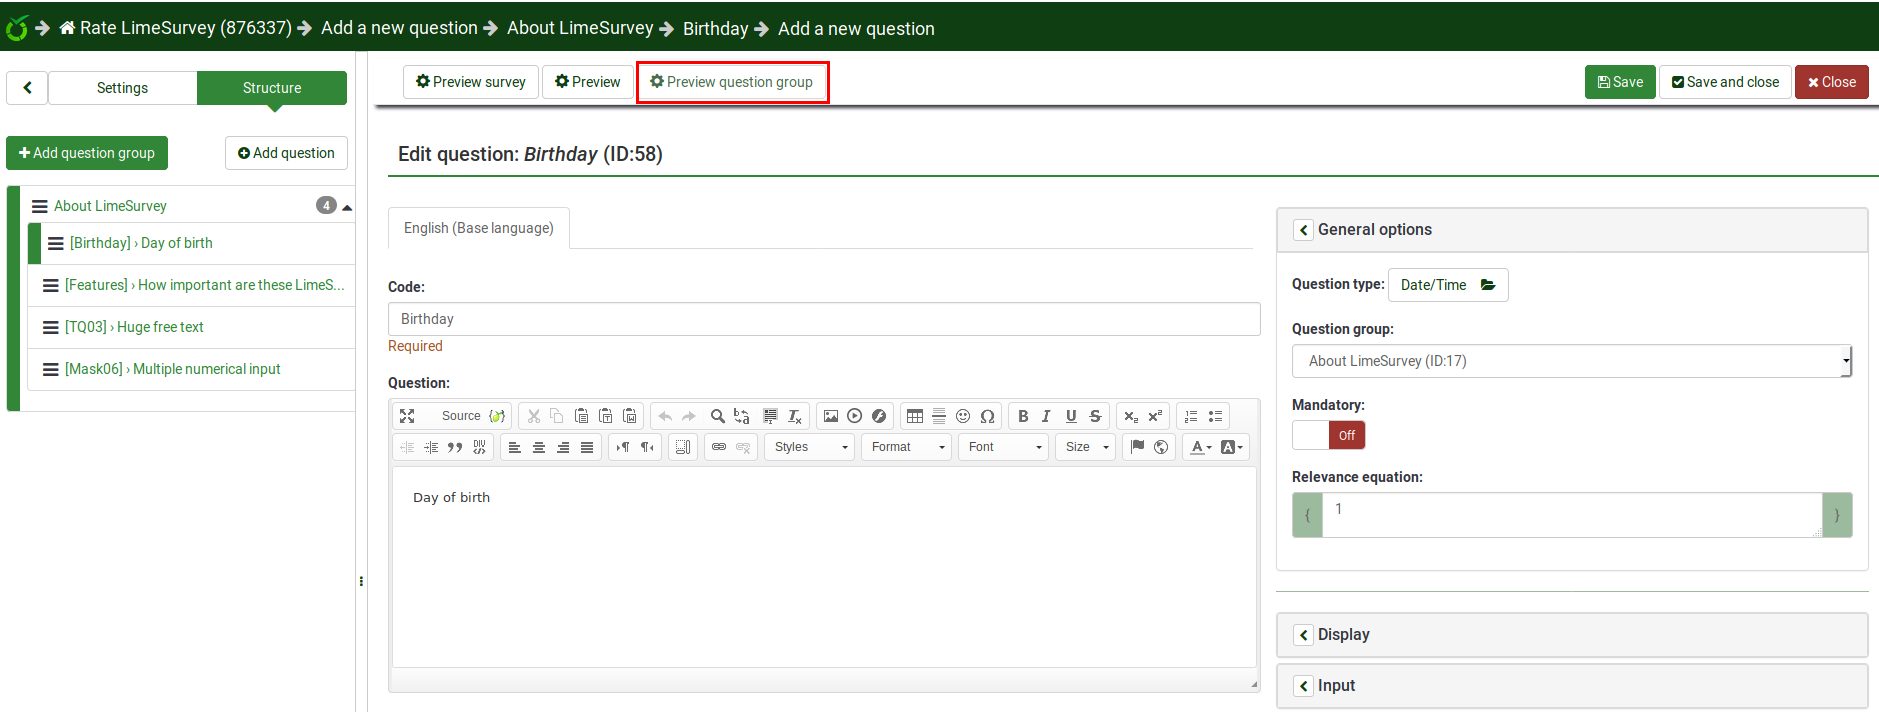
preview question group - question panel
The question group to which questions belong can be previewed from the question panel - see the top bar:
Reordering question groups
The question groups and questions can be reordered. For further details, read the survey structure wiki subsection.
Example
The relevance equation offers many possibilities to further customize your survey. A simple example is presented below to show how some question groups can be hidden according to the answer provided by the respondent to a prior question (part of another question group). For example, if you want to find out more information about parents that have one child in comparison to those with two or more, using the relevance equation to hide certain questions/question groups is recommended.
Link .lss file: Question_groups_simple_example.zip -> For instructions on how to import the file, refer to the following wiki section.
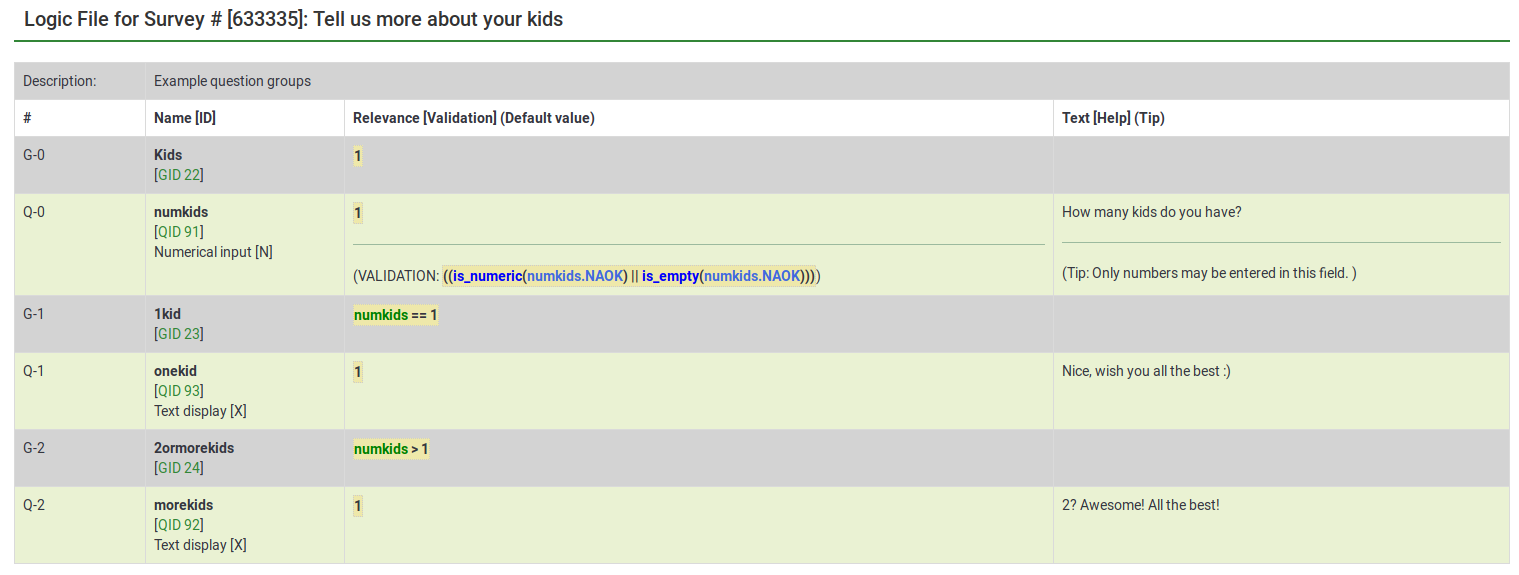
The above file contains three question groups, each containing one question. Question group "1kid" is displayed only if the value introduced by the respondent to the question "numkids" is 1. Question group "2ormorekids" is displayed only if the answer to the question "numkids" is >1.
This is just a simple example to show how expressions can be used to further customize your survey. For more details, please read about the ExpressionScript functionality.
- There are several ways to hide questions. One is to use conditions. However, for more complex surveys, the ExpressionScript has to be used.
- If you use expressions, don't forget to look for syntax errors with the help of the logic file.
