Gestire gruppi di utenti
From LimeSurvey Manual
Generale
La funzionalità Gruppi di utenti è stata aggiunta in modo che gli utenti dell'amministrazione di gruppo possano essere inseriti in singoli gruppi.. Tuttavia, questa opzione ha funzionalità limitate al momento. Non ci sono permessi reali legati a un gruppo. I gruppi servono più come macro o convenienza testuale per lavorare con gruppi di utenti amministratori.
Gestione gruppi utenti
Se fai clic sul pulsante Crea/modifica gruppi di utenti che si trova nella finestra di dialogo Configurazione, verrai indirizzato alla pagina di gestione del gruppo di utenti.


Crea gruppi di utenti
Per aggiungere un gruppo di utenti, fare clic sul pulsante Aggiungi nuovo gruppo di utenti situato nell'angolo in alto a sinistra della finestra. Digita il nome e la descrizione del gruppo di utenti e fai clic su Salva:

Ora puoi aggiungere utenti al gruppo di utenti appena creato selezionando l'utente desiderato dall'elenco a discesa e facendo clic sul pulsante Aggiungi utente.
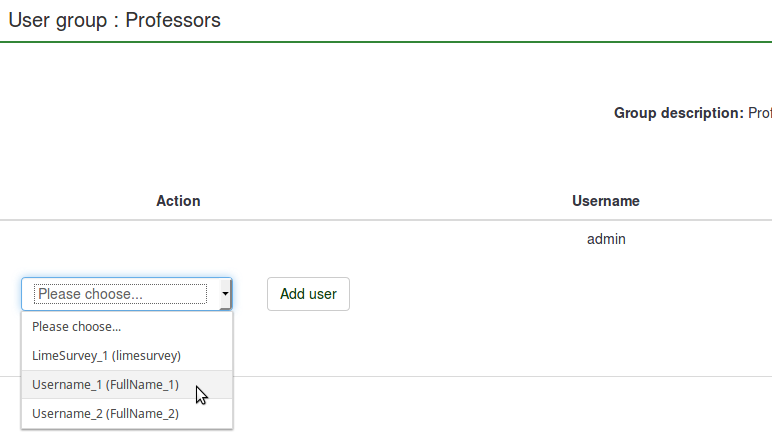

Fare clic su Chiudi (parte in alto a destra della finestra) per tornare all'elenco dei gruppi di utenti. È possibile osservare il gruppo appena aggiunto nell'elenco. Nella tabella sono forniti i seguenti dettagli:

- ID gruppo utenti : Mostra un ID univoco assegnato automaticamente a ciascun gruppo utenti.
- Nome : Il nome del gruppo utenti.
- Descrizione : La descrizione del gruppo utenti.
- Proprietario : Il proprietario/creatore del gruppo utenti. Il proprietario non può essere cambiato. Se questo è necessario, bisogna cancellare il gruppo e crearne un altro.
- Membri : Mostra il numero dei membri del gruppo utenti;
- Azione : L'ultima La colonna mostra una serie di azioni disponibili per ogni gruppo di utenti dall'elenco dei gruppi di utenti. Di seguito sono presentate le seguenti azioni del gruppo utenti: visualizza utenti, modifica gruppo utenti, invia email gruppo utenti e elimina gruppo utenti.
Visualizza i membri del gruppo utenti
Se fai clic sulla tabella verde, verrà mostrata una vista più dettagliata dei membri del gruppo di utenti.
Modifica gruppo utenti
Facendo clic sulla penna verde è possibile modificare il nome e la descrizione del rispettivo gruppo di utenti.
Invia email al gruppo utenti
Il simbolo della posta verde consente all'amministratore del gruppo di inviare e-mail di massa ai membri di quel gruppo di utenti. La sua funzionalità include:
- Inviami una copia: se selezionato, verrà inviata un'e-mail al proprietario del gruppo utenti/colui che ha creato il gruppo utenti.
- Oggetto: Digita l'oggetto desiderato della tua email.
- Messaggio: Digita il messaggio che desideri inviare ai membri del gruppo utenti.
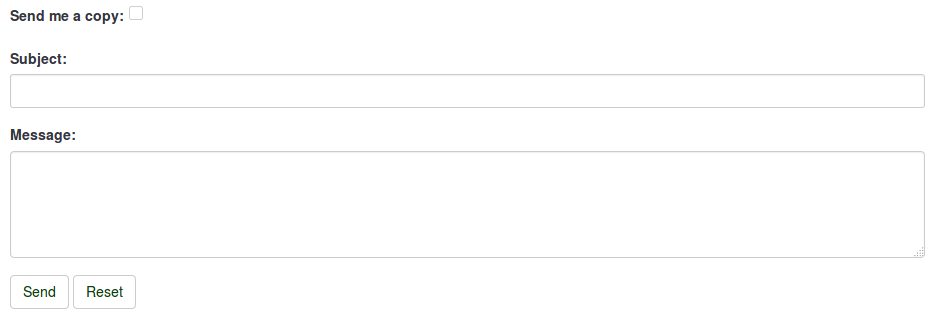
Quindi, fai clic sul pulsante Invia situato sotto la casella di testo Messaggio.
Elimina gruppo utenti
To delete a user group, click the red wastebin button that is located on the line with the user group that you wish to delete and hit OK.
un Gruppo di utenti può essere scelto come oggetto di Impostazioni di sicurezza dell'indagine. All'interno di un sondaggio, clicca sull'icona Sicurezza Indagine. Una volta dentro, puoi aggiungere sia utenti individuali che gruppi di utenti. Aggiungendo un singolo utente puoi dargli specifici privilegi in quell'indagine, come: modificare le domande, attivare il sondaggio ed anche visualizzare i risultati e molti altri. L'aggiunta di un Gruppo di utenti si comporta come una funzione macro che semplicemente, in un solo istante, associa all'indagine tutti gli utenti appartenenti a tale gruppo e che per questo possiedono gli stessi permessi.
A user group can be used to offer specific survey permissions, like editing the questions, activating the survey, and/or viewing the responses among others. Adding a user group behaves like a macro function that simply adds all the current members of the user group with the same privileges at that same time to the Survey.
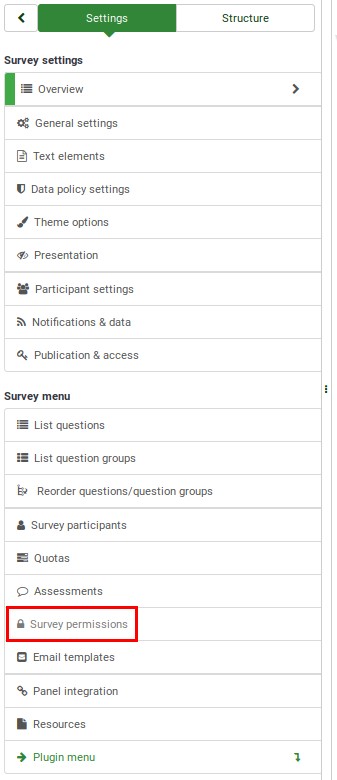
To change the survey permissions, go to the Settings menu of your survey. Click on Survey permissions and choose the user group that should be granted survey permissions:

Select in the next step the permissions that you allocate to the members of that user group. Do not forget to click the double-right arrowhead to get an extended view of the permissions matrix.
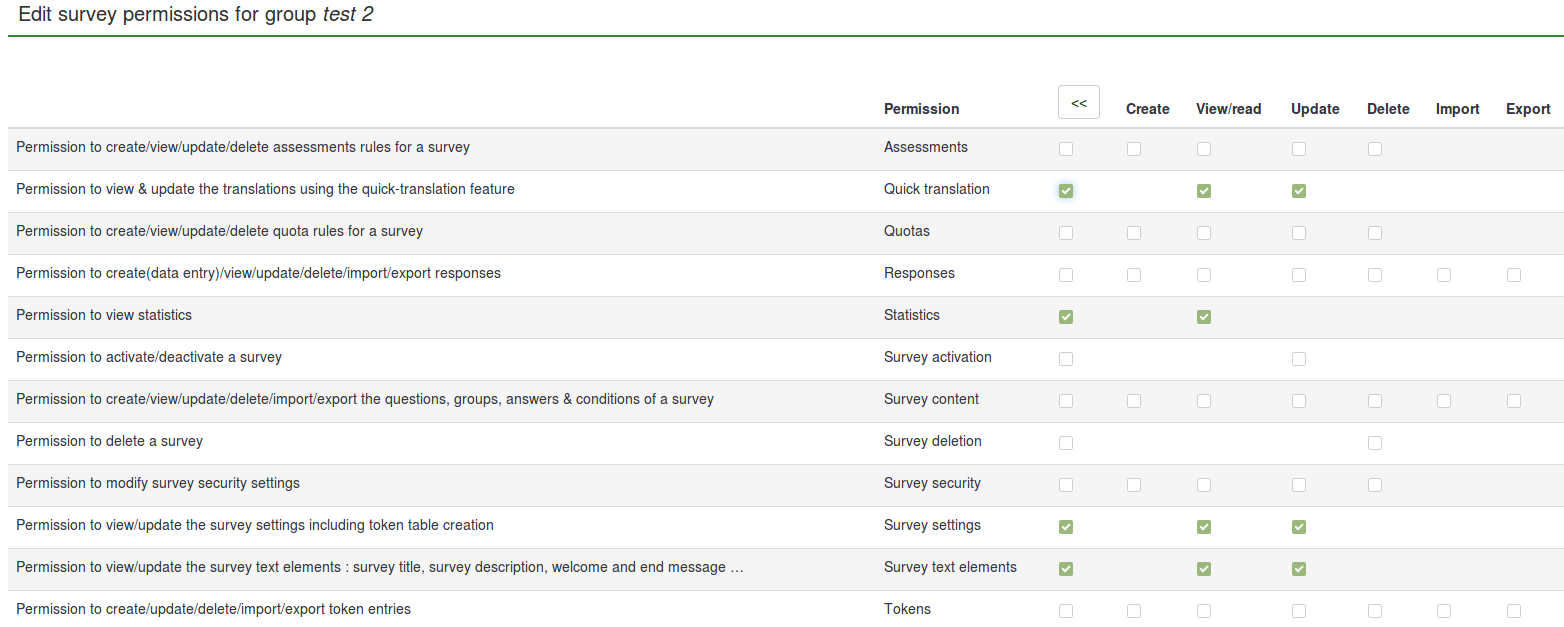
After you have finished editing the survey permissions, click the Save button, which is located in the upper right part of the screen. Some examples are provided below in order to help you get a better understanding of the Limesurvey's survey permissions system.
Things to watch out for
Some limitations of the user group functionality are presented below:
cambiamenti ad un Gruppo di utenti dopo l'aggiunta ad un'indagine non provocheranno cambiamenti nelle Impostazioni di sicurezza dell'indagine. I membri del gruppo sono bloccati al momento in cui il gruppo è stato aggiunto nelle "Impostazioni di sicurezza dell'indagine".
Because the user group functions are still experimental, we kindly ask you to pay attention to any inconsistencies you may find while using LimeSurvey and report them via the bugs tracker (recommended) or the ticket system.
Examples
Some examples are provided below to help you better understand how a LimeSurvey user group works:
Informing members of a user group that they have received certain survey permissions
- Log in.
- Go to the user groups list and click the green mail sign (located on the last column of the table).
- Type the subject and the text body of the email.
- Send it.
Granting certain permissions to a user group
- Log in as admin (or as a user that has the 'Survey security' and 'Survey content' permission).
- Create a user group.
- Add users to the user group.
- Go to the Survey permissions page of the survey.
- Add the user group and offer its members the survey permissions you wish them to have.
Adding a user to a user group
As mentioned above, adding a user group behaves like a macro function that simply adds all the current members of the user group, easing the process of granting survey permissions. However, if a new member is added to that user group, that member will not automatically receive the rights that were previously granted to the other members of the user group. Therefore, you will have to repeat the steps shown in the example from above in order to grant him or her the same rights or you just add him or her separately, using the Add user function (from the 'Survey permission' panel).
Removing permissions of a user no longer in a user group
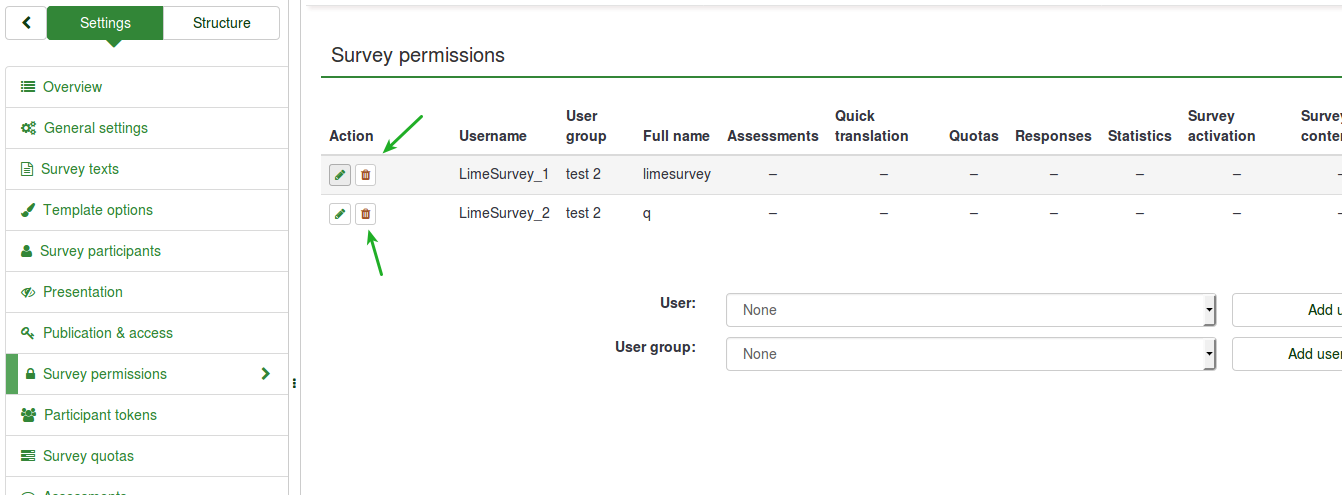
Removing him from the group should leave him without any user group permissions. However, this is not happening due to the limitations of the user group functionalities! If you delete the user from the user group, he or she still remains with the user group survey permissions. Therefore, a workaround is to manually delete the account from the 'Survey permissions' table.
- Log in as administrator (or as a user with 'Survey security' permission).
- Go to the Survey permissions page, which can be accessed from the Settings of the survey.
- Delete the respective user from the 'Survey permissions' table.

Removing all user group members with access to a survey
As mentioned above, deleting a user from a group won't retrieve his survey permissions. The same goes for 'user groups'. Deleting a user group won't retrieve the survey permissions that were previously granted to the members of the respective user group. At the moment, the only viable solution is to have them manually removed from the 'Survey permissions' table.